Introduction to Cleaning a Gas Stove
Keeping your gas stove clean should be part of your regular kitchen maintenance routine. Allowing grease, food particles and grime to build up can lead to inefficient burner performance and potentially hazardous situations. Giving your stove a good cleaning every few months will help it operate safely and effectively for years to come.
The main areas requiring cleaning are the burners, grates, drip pans and the stove top surface itself. Common cleaning agents like dish soap, baking soda, vinegar and lemon can tackle most messes. The main areas requiring cleaning are the burners, grates, drip pans and the stove top surface itself.
Each has a slightly different cleaning process depending on the material. Proper scrubbing tools help remove stubborn deposits.
In this article, we’ll walk through each step of the gas stove cleaning process.
We’ll cover which supplies you need to gather, how to safely disassemble the various components and the best cleaning methods for each part. Following these gas stove cleaning tips will keep your stovetop shining and allow you to cook delicious meals for your family.
Safety Precautions When Cleaning a Gas Stove
Cleaning a gas stove requires taking some basic safety precautions. Make sure the stove is completely cool before cleaning.
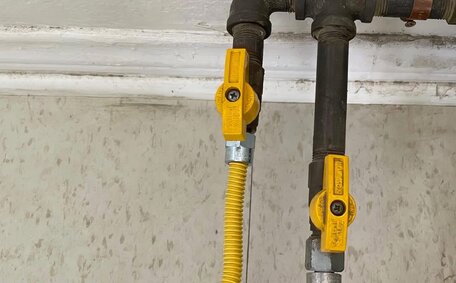
Turn all knobs to the off position and unplug the stove if it uses electricity. It’s also advisable to turn off the gas supply via the shut-off valve before cleaning around any gas connections.
Wear gloves to protect your hands from harsh chemicals. Rubber gloves provide grip and resist stains. You may also want to wear goggles to shield your eyes from splashes of cleaning solutions.
Work in a well-ventilated area so fumes don’t build up. Avoid mixing cleaning products that can react and release toxic gases. Don’t let any moisture get into the gas valves or burners.
Use caution when scrubbing caked-on grime. Metal scouring pads and brushes can scratch surfaces. Start with gentle cleaners like baking soda before trying abrasive products.
Rinse stove parts thoroughly after cleaning. Make sure no chemical residue remains before reattaching burner caps and grates. Completely dry all components before turning the gas back on.
Take care when lifting heavy grates and oven doors. Bend at the knees and avoid twisting. The extra effort required for deep cleaning is worth it to keep your gas stove safe for cooking.
Supplies Needed to Clean a Gas Stove
Cleaning a gas stove doesn’t require many specialty products. With some common household items, you’ll have everything you need to make your stove look like new.
Here are the basic supplies for gas stove cleaning:
- Dish soap - An all-purpose cleaner like dish soap mixed with warm water can tackle most grime on a stove.
- Baking soda - Baking soda forms a slightly abrasive paste when mixed with water. It helps scour away tough burnt-on stains.
- White vinegar - Vinegar cuts through grease and enhances the cleaning power of other products.
- Old toothbrush - The bristles reach into crevices to remove crusty food deposits.
- Microfiber cloths - Microfiber cloths grab and trap dirt without leaving behind lint.
- Plastic scouring pad - For stuck-on bits, a soft plastic pad provides just enough scrubbing power.
- Small bucket - A bucket keeps all your supplies together in one place.
- Rubber gloves - Protect your hands from hot water and chemicals while cleaning.
- Safety goggles - Shield your eyes from splattering cleaning solutions.
With this basic cleaning kit prepped and ready to go, you have everything you need to renew your gas stove in no time.
Removing and Cleaning the Grates
After unplugging and allowing your gas stove to fully cool, the next step is to remove the grates. Take care when lifting the grates as they can be heavy. Place them on a protected surface while cleaning.
Check the owner’s manual to see if your grates are safe to soak in water. Place them in a sink or bucket filled with warm water and a small amount of dish soap.
Most enamel, stainless steel and cast iron grates can be submerged. Allow them to soak for 30 minutes to loosen baked-on food and grease.
For grates that cannot be soaked, place them directly into your sink or outside and spray with warm, soapy water. Allow the solution to penetrate stains for a few minutes before scrubbing.
Use a plastic scouring pad, scrub brush or old toothbrush to work away stubborn deposits on the grates. A microfiber cloth helps wipe up loosened grease. Rinse thoroughly with clean water to remove all soap residue.
After scrubbing, run your grates through the dishwasher or hand wash completely. Dry them thoroughly with a lint-free cloth. Avoid putting wet grates directly back onto the stove - trapped moisture can affect burner ignition.
Once fully dry, replace the grates in their original positions on your stove. Get them perfectly aligned with the burners for maximum stability while cooking. Your freshly cleaned grates will make meal preparation easier and safer.
Cleaning the Burners and Burner Caps
The burners and burner caps tend to collect spilled food and grime during cooking. Give them a good scrubbing to allow for proper gas flow and ignition.
Start by removing the caps from the burner bases. Soak them in warm, soapy water for about 30 minutes. Use an old toothbrush or other soft brush to gently clean the small gas holes in each cap if they are clogged.
Remove the burner heads and bases and place in the soapy water as well. Use a plastic scouring pad to scrub away any hardened food or grease deposits. Rinse all parts thoroughly.
Wipe down the surface of the burner bases with a damp microfiber cloth. Avoid getting any moisture into the gas ports. Let the caps and burners dry completely.
Before replacing the caps, inspect the burner bases for any blockages around the gas ports. Insert a sewing needle or pin into each hole to clear out any debris.
Replace the burner heads first, then the caps. Check that they are seated properly and aligned with the burners. Your stove’s ignition and performance will be greatly improved after a good cleaning of the caps and burners.
Cleaning the Cooktop Surface
With the burners and grates removed, you’ll have full access to the cooktop surface. With the burners and grates removed, you’ll have full access to the cooktop surface. For stainless steel surfaces, wipe down with a cloth moistened with warm water and dish soap.
Buff dry with a clean, soft cloth.
For heavier grime buildup on the stove top, make a paste of baking soda and water.
Apply the paste with a microfiber cloth and let sit for 5-10 minutes. The baking soda will help break down stubborn grease and burnt-on stains. Apply the paste with a microfiber cloth and let sit for 5-10 minutes.
Rinse the cooktop thoroughly and wipe clean with a fresh damp cloth. Vinegar is great for removing soap residue and enhancing shine on stainless steel. Spray the surface with undiluted white vinegar and wipe clean.
Avoid using harsh abrasives like steel wool pads, as they can scratch the cooktop finish. Always scrub gently in the direction of the grain. Use clean, dry cloths to buff the metal back to a brilliant shine.
With some elbow grease, your gas or electric stove cooktop will be restored. With some elbow grease, your gas or electric stove cooktop will be restored. It also makes wiping up future spills a breeze. Just be sure to let the surface dry fully before turning your stove back on.
Reassembling the Gas Stove
After thoroughly cleaning each component, you’ll need to properly reassemble your gas stove. Take care when handling the parts to avoid damaging them or your stove.
Start by replacing the burner bases in their original positions. Start by replacing the burner bases in their original positions. Start by replacing the burner bases in their original positions.
Make sure they are fully seated and aligned.
Set the grates back in place one by one. Align them evenly over the burners for stability. Ensure there is no debris blocking the grate from sitting flush.
Do a final wipe down of the stove top with a dry microfiber cloth. Make sure no moisture remains before turning the gas back on.
Slowly turn on each burner, starting with low flame, and check for proper ignition and flame colour. If any burners don’t ignite, there may still be blockages in the gas ports. Turn the gas off and use a pin to clear obstructions.
With everything cleanly reassembled and operational, your gas stove will be ready for many more home cooked meals. Be sure to wipe up spills promptly after each use.
Maintaining a Clean Gas Stove
Cleaning your gas stove regularly is the best way to keep it operating safely and efficiently for the long term. Set a reminder to deep clean your stove and its components every 3-4 months.
In between thorough cleanings, quickly wipe up any spills or splatters after each use. Don’t allow food residue or grease to sit and harden on hot surfaces. Keep a damp microfiber cloth handy while cooking to easily wipe up smaller messes.
Check burner flames occasionally for proper blue colour and shape. Yellow, uneven flames can indicate blocked gas ports. Use a sewing needle or pin to gently clear any obstructions and restore proper gas flow.
Replace old burner caps and grates as needed. Clogged parts with excessive corrosion or warping can lead to poor burner ignition. Upgrade to higher quality grates and caps to extend the life of your gas stove.
With periodic deep cleanings and daily care, your gas stove will give you many years of reliable service. Putting in the small effort required will help you safely prepare meals for your family.
Frequently Asked Questions
Do I need to clean the drip pans?
Yes, it’s a good idea to clean the drip pans regularly when cleaning your gas stove. Grease and food drippings can collect in the drip pans underneath the burners. Remove and wash the drip pans in warm soapy water, then dry thoroughly before replacing them.
What’s the safest way to clean stainless steel surfaces?
Use a gentle cleaner like dish soap and water to clean stainless steel surfaces.
For tough spots, make a paste with baking soda. Avoid abrasive cleaners that can scratch the finish. Wipe in the direction of the grain and dry completely.
Should I avoid using harsh chemicals when cleaning my gas stove?
It’s generally best to stick to mild cleaners like dish soap, baking soda and vinegar when cleaning a gas stove. Don’t mix chemical cleaners, as toxic fumes can result. Avoid getting cleaners or moisture into the burners or valves.
How often should I deep clean my gas stove?
For optimal performance, do a thorough deep cleaning of all the components of your gas stove every 3-4 months. Quickly wiping up spills after each use will also help maintain cleanliness between deep cleanings.
What areas of my gas stove should I focus on when cleaning?
Be sure to thoroughly clean the burner caps, burner heads, grates, drip pans and cooktop surface. Remove all parts and soak or scrub away baked-on grease deposits. Clear any clogged gas ports in the caps and heads as well.